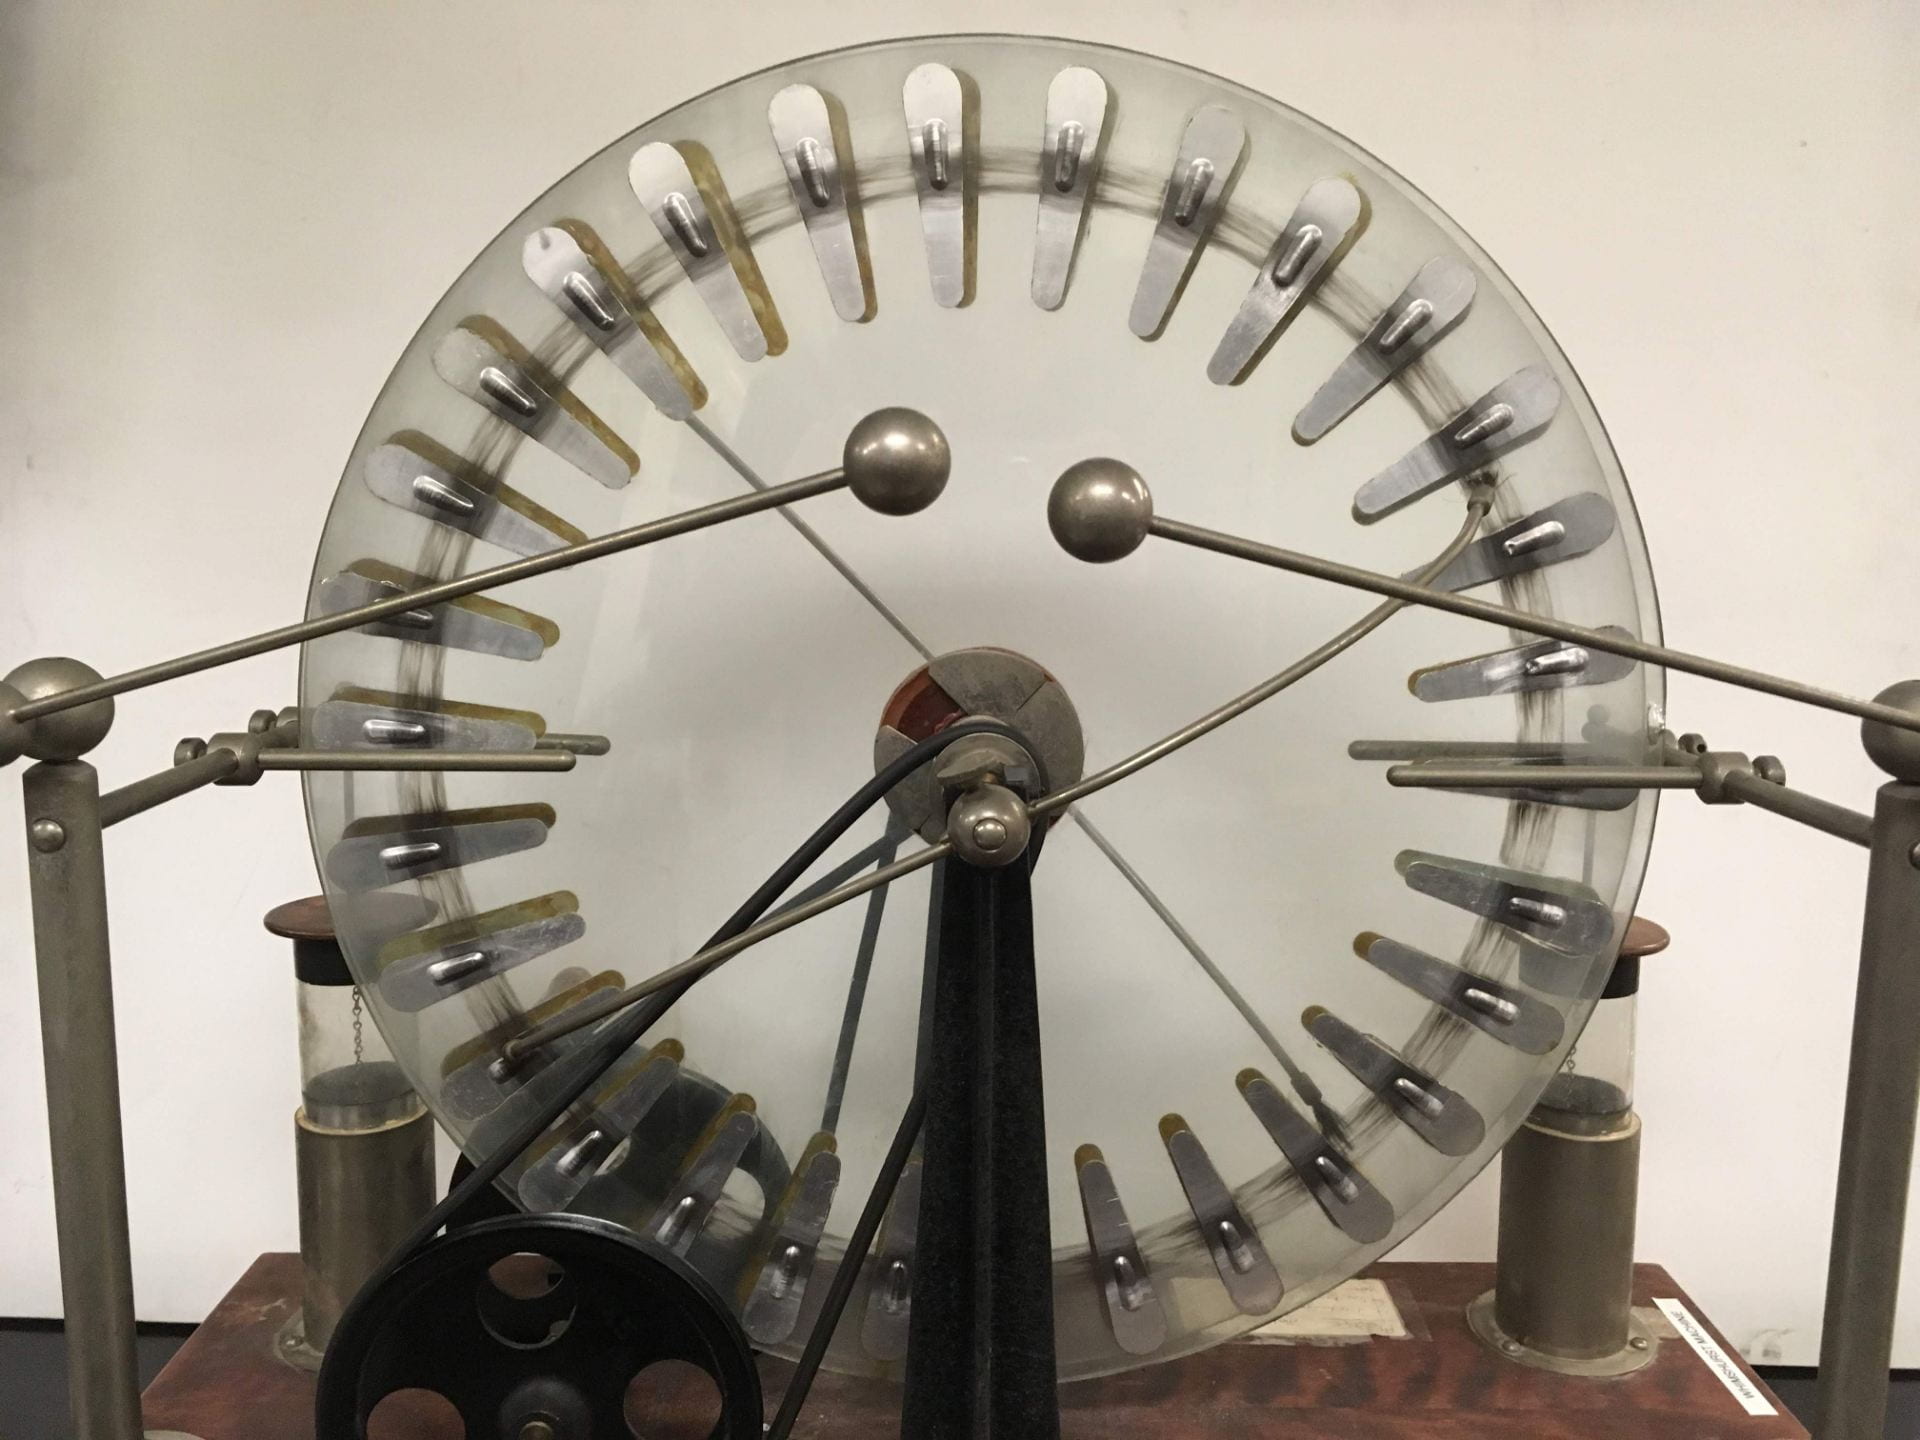
Fig. 1 – Whimshurst Machine
Materials:
- Whimshurst machine
- Van de Graaff generator
- Banana cable
Setup:
One plate must be charged before the machine will work. This is done easily with a Van de Graaff generator by touching a lead from the charged dome to a single plate on the Whimshurst machine. Once one plate is charged, adjust the electrodes so that they are about 1 inch apart, turn the crank, and watch the sparks. Be careful to discharge the leyden jars by touching the electrodes together when finished because the machine can generate up to 100,000V.
Explanation:
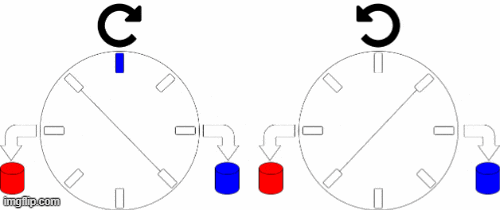
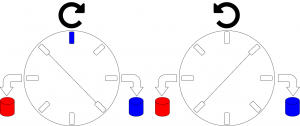
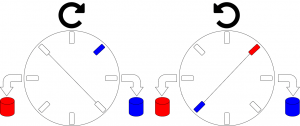
Blue signifies a negative charge and red signifies a positive charge
-
- Step 1
-
- Step 2
-

- Step 3
-
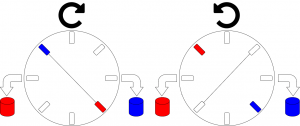
- Step 4
The Whimshurst machine generates high voltages through induction rather than by friction which is how most electrostatic generators work. A crank is rotated to spin two wheels, with separated metal plates, in opposite directions. As these wheels spin, two perpendicular brushes connect plates on opposite sides of each wheel as shown in fig. 1. The machine MUST start with a charge on one of the metal plates of a wheel as the machine needs an imbalance of charges to induce a potential.
First, an initial, negative, charge is induced on one plate on the front side of the machine via a van de Graff generator. After this step, the charges on the plates can be represented by step 1. After the initial charge is set, the wheel is cranked, starting to spin the wheels in opposite directions. Let’s say our initial charge is on the top of the front wheel which is spinning clockwise. After the wheel has rotated an eighth of a rotation, our charged plate will now be lined up with one end of the brush on the back side of the machine. Our negatively charged plate causes an imbalance in this brush and, therefore, the two plates that this brush connects at its bristles. This causes the plate directly across our initially charged plate to become positively charged, and the other plate the brush touches to become negatively charged. Now our charges can be represented by step 2.
Now we have 3 charged plates: our initially charged negative plate on the front wheel, and two oppositely charged plates on either ends of the back wheel. As our wheels turn another eighth of a rotation, our initially charged plate passes by the right side Leyden jar collector as our most recently charged plates rotate to the top and bottom positions of the back wheel, represented by step 3. At this state, these back wheel charges are unchanging, while the front wheel charge is collected into the right hand Leyden jar, which will start to build up negative charge.
After another eighth of a rotation, we see that the initially charged plate on the front wheel is no longer charged as its charge was collected into the Leyden jar. The back plate however, has rotated such that the charges on the back plate now line up with the brush on the front plate, repeating the charge inducing process seen in step 2. The front plate now has two opposite charges induced where the brush connects two opposite plates, represented by step 4.
During rotations of the wheels, as the charged plates pass the Leyden jars, their charges are collected and stored. The Leyden jars act as large simple capacitors by collecting either a negative or positive charge delivered by the charged plates on the inside of the jar which causes the outside of the jar to accumulate the opposite charge. As these charges increase, the potential between the electrodes connected to the Leyden jars increase until a spark is formed and the Leyden jars are discharged.
Notes:
- Set the electrodes behind the machine about an inch apart to begin with, and then adjust. Rotate the crank to produce sparks across the electrodes.
- Warning: This machine can generate potentials up to 100,000 Volts. Use caution when working close to the leads and make sure to discharge the leyden jars by touching the electrode contacts. One can hold the insulated ends of the rods to manipulate the contacts without danger of shock.
Written by: Finn Amend